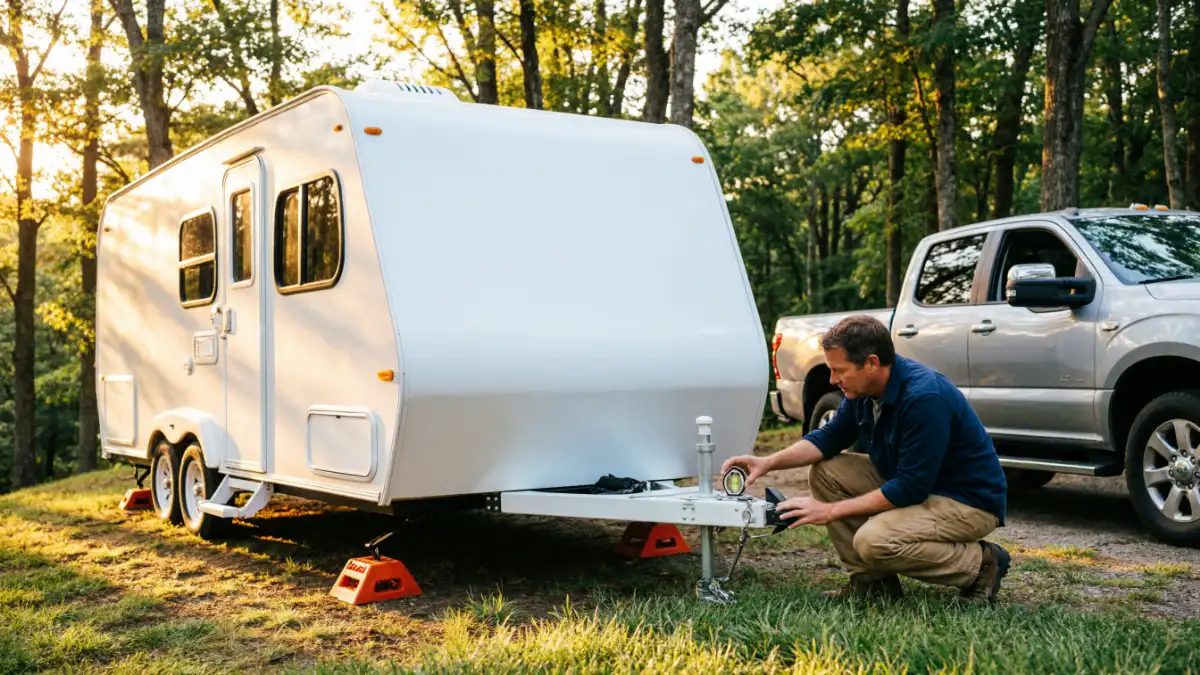
You pull into camp after a long drive. The sunset is perfect, and the fire pit is ready. Then you set a marble on the kitchen floor and watch it roll away. Your fridge hums wrong, the shower drains slowly, and your bed feels like a ramp.
That is what an unlevel travel trailer does. It ruins sleep, strains your gear, and can hurt your appliances. The good news is that leveling takes about 15 minutes once you know the steps. This guide shows you how to level a travel trailer on any site, from a smooth state park pad to a bumpy forest road. You will also learn which tools help most, which mistakes to skip, and when to call a pro.
Featured Snippet:
To level a travel trailer, park on the flattest spot you can find. Check side-to-side balance first, then front-to-back. Drive the low-side tires onto leveling blocks or ramps, chock the wheels, and unhitch. Finally, raise or lower the tongue jack until the bubble level sits in the middle.
Quick Facts: Travel Trailer Leveling at a Glance
Leveling means making your trailer flat from side to side and from front to back. Most owners need only a few basic tools and about 10 to 20 minutes. Always check your owner’s manual for the exact rules that apply to your model.
| Item | Quick Answer |
| Time needed | About 10–20 minutes |
| Level first | Side to side |
| Level second | Front to back |
| Basic tools | Bubble level, blocks or ramps, wheel chocks |
| Do stabilizers level? | No, they only reduce rocking |
| Hardest part | Uneven or soft ground |
| Verify | Your owner’s manual and appliance guides |
What Is the Best Way to Level a Travel Trailer?
The best way is to level side to side with blocks or ramps under the tires, then level front to back with the tongue jack. Chock the wheels before you unhitch. This order keeps your work simple and safe. It also avoids the need to redo your steps.
Here is the full process in order:
- Pick the flattest part of the campsite.
- Place a bubble level inside or on the trailer.
- Check which side sits low.
- Put blocks or ramps in front of the low-side tires.
- Drive up slowly, with a helper guiding you.
- Set the parking brake and place wheel chocks.
- Unhitch the trailer.
- Use the tongue jack to level front to back.
- Lower the stabilizer jacks to stop rocking.
Remember: Level first, stabilize last.
Where Do You Put the Levels on a Travel Trailer?
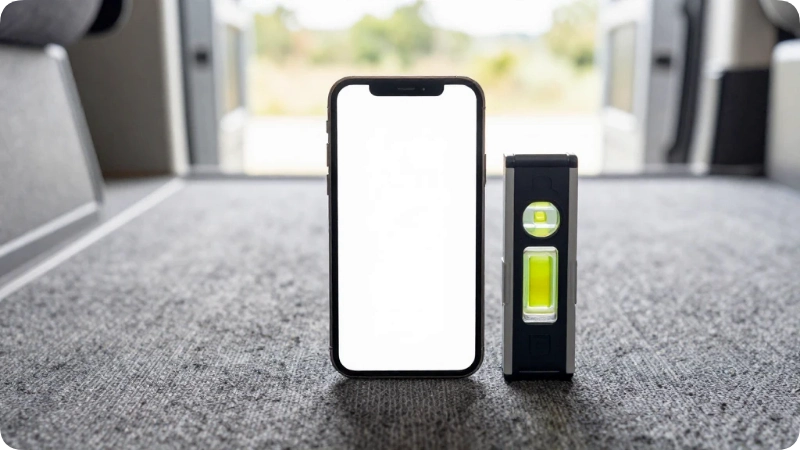
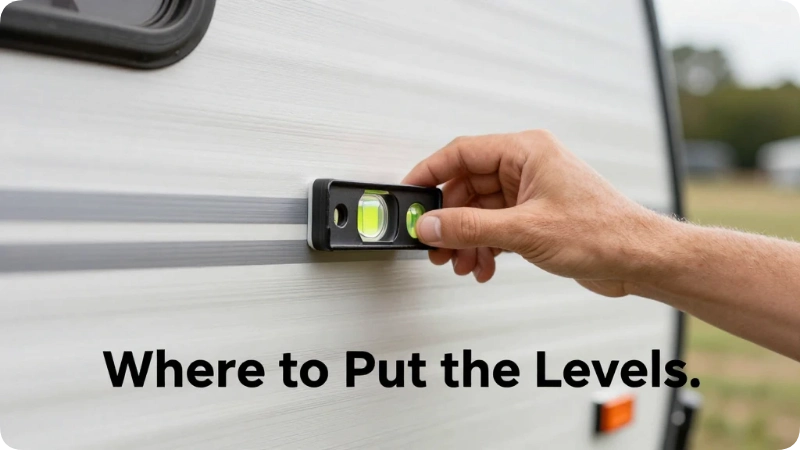
Place one bubble level on the tongue or A-frame for front-to-back checks. Place another on the frame or floor near the door for side-to-side checks. Using two spots gives you a true reading. A single level can fool you if it sits on a slanted surface.
Many owners add a few more spots for extra accuracy. Good places include:
- The A-frame near the coupler
- The inside floor by the entry door
- The kitchen counter, if it sits flat
- The top of the refrigerator, for a quick check
Some trailers have built-in levels on the outside wall. These work fine, but they can be hard to read at night. A small stick-on level costs little and fits almost anywhere. Always look at the bubble from straight above or straight on. Reading from an angle gives a false result.
How to Level a Travel Trailer Side to Side
To level side to side, find the low side with your bubble level. Place blocks or ramps in front of the tires on that side. Drive up slowly until the bubble centers. Then set the chocks and brake. Always fix side-to-side tilt before you touch the tongue jack.
Follow these steps:
- Park where you plan to camp, with the trailer still hitched.
- Set a level on the floor or frame near the door.
- Note which direction the bubble moves.
- Stack blocks or set a ramp in front of the low-side tires.
- Have a helper stand where you can see them.
- Drive forward in small bursts, and stop often.
- Check the bubble after each move.
- Stop when the bubble sits in the center.
Tip: Add blocks a little at a time. Over-raising one side wastes effort and time.
How to Level a Travel Trailer on Uneven Ground
On uneven ground, choose the flattest spot you can find, then use stacked blocks, ramps, or a leveling system. Add plywood under your gear on soft dirt or sand. Never guess. Walk the site first, since a few steps of extra searching can save you an hour of work.
Uneven sites are common at forest campgrounds, boondocking spots, and older parks. Many national forest and state park sites have natural slopes. Here is how to handle them:
- Scout first. Walk the pad and look for the flattest strip.
- Back in straight. Aim to leave the least slope under the tires.
- Use a base. Put a solid board under blocks on soft soil.
- Go slow. Stack blocks in small steps.
- Check twice. Level again after you unhitch.
If the slope is very steep, ask the campground host for another site. Some places will move you for free. Trying to level a steep pad can stress your tires and tongue jack.
How to Level a Camper Without Moving It
To level a camper without moving it, raise the low side using a jack and blocks, or use a built-in leveling system. This works when you cannot drive onto ramps. Never crawl under a trailer held up only by a jack. Use proper stands and always follow your manual.
Sometimes you park first and notice the slope later. Or the site is too tight to drive again. In that case, you have a few options:
- Built-in jacks: Some trailers have powered or manual corner jacks that can lift and level.
- Bottle jack with blocks: Lift the low corner slightly, slide blocks in, and lower slowly.
- Air bags or portable lift systems: These are sold by RV retailers and fit some trailers.
Safety note: Stabilizer jacks are not made to lift your trailer. They are built only to reduce rocking. Using them as lifts can bend the frame or break the jack.
How to Level a Camper on Blocks
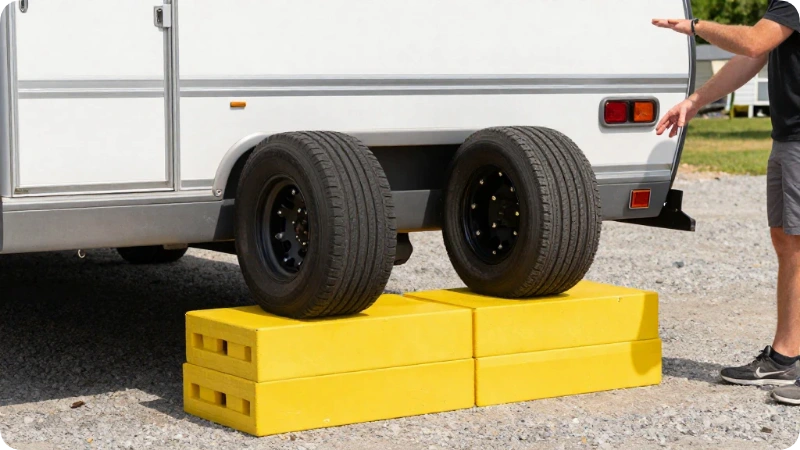
To level a camper on blocks, stack sturdy blocks under the low-side tires, drive up slowly, and stop once the bubble centers. Use blocks rated for your trailer’s weight. Place them on firm ground. Chock the wheels right away to stop any roll.
Many campers use plastic interlocking blocks because they are light and strong. Wood works too, if it is thick and dry. Avoid cinder blocks and stones, since they can crack under weight.
Here is a simple blocking routine:
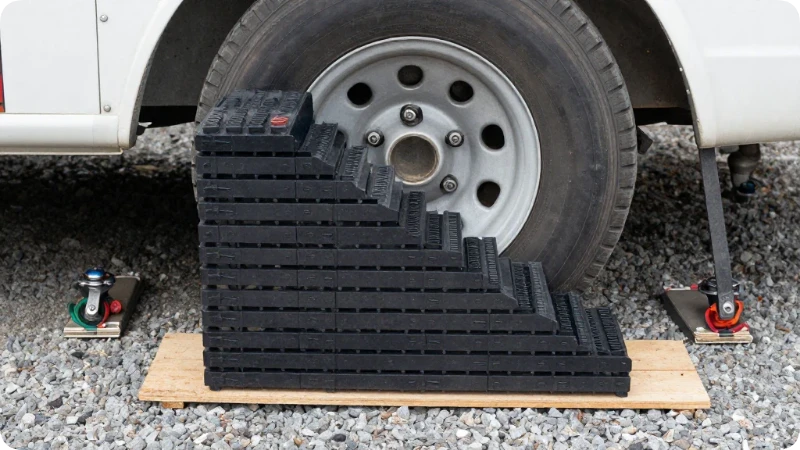
- Stack blocks in a stair-step shape.
- Place a flat board under the stack on soft ground.
- Roll up slowly onto the top step.
- Check the bubble level.
- Set the chocks on both sides of the tires.
Also, keep your hands and feet clear of the tires while you roll. A helper makes the job safer and faster.
How to Level a Camper With Stabilizer Jacks
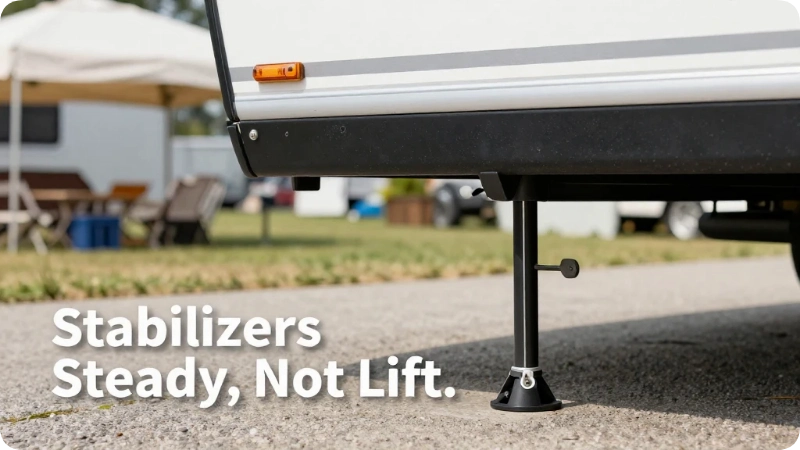
You cannot truly level a camper with stabilizer jacks. These jacks only steady the trailer and cut down on shaking. Use blocks, ramps, or the tongue jack to level first. Then lower the stabilizers until they touch the ground and feel snug, not tight.
This is a common mistake, so it deserves a clear explanation. Stabilizers sit near the corners of the frame. They are designed to take up small gaps, not to carry weight. If you crank them hard to lift a tire, you can damage the frame or the jack itself.
A better routine looks like this:
- Level the trailer using blocks or ramps.
- Lower the stabilizers until they touch the ground.
- Add one small turn for a firm feel.
- Walk inside and check for wobble.
Check your manual for the weight limits on your specific jacks.
Leveling a Dual Axle Travel Trailer
To level a dual axle travel trailer, use blocks or ramps wide enough for both tires on the low side, or use a tandem leveler. Set them so both tires rest on the riser. Then adjust the tongue jack. Take extra care because dual axles roll differently than single axles.
Dual axle trailers are heavier and longer. They also need more room to roll up. Keep these tips in mind:
- Use tandem-ready gear. Some ramps and blocks are made for dual-axle setups.
- Raise both tires evenly. One tire alone can carry too much weight.
- Chock every possible tire. Place chocks on both sides of one axle, or as your manual suggests.
- Check the tongue weight. After leveling, the tongue jack should still feel stable.
Stack blocks wide and flat. A narrow stack can tip under a heavy trailer.
Travel Trailer Leveling System: Manual vs. Powered
A travel trailer leveling system is a set of jacks or tools that raise and lower your trailer to a level position. Options include manual blocks, ramps, powered electric jacks, and hydraulic setups. The best choice depends on your budget, trailer size, and how often you camp.
Here is a simple comparison:
| Type | Best For | Main Drawback |
| Plastic blocks | Weekend campers | Takes time and effort |
| Ramps | Quick setup | May not fit every tire |
| Electric jacks | Frequent travelers | Costs more |
| Hydraulic systems | Large trailers | Needs installation and upkeep |
Prices and features change often. Verify current details with the manufacturer or a trusted RV dealer before buying. Also check that the system matches your trailer’s weight rating. Your dealer or an RV technician can confirm it works with your frame.
Do Travel Trailers Have Self-Leveling?
Most travel trailers do not come with self-leveling. It is usually an optional upgrade or add-on. Self-leveling systems are more common on motorhomes and larger fifth wheels. Some travel trailer owners add automatic or semi-automatic jacks, but the setup must match the trailer.
Auto-leveling systems use sensors and powered jacks. You press a button, and the system lifts the low corners until the bubble is level. This saves time and effort. However, these systems can add weight and cost, and they need maintenance.
Before adding one, ask yourself:
- How often do I camp on uneven sites?
- Does my trailer frame support the extra weight?
- Do I need a licensed installer?
Even with automatic jacks, it helps to know manual leveling. If power fails, you will need it.
What Is the Best App for Leveling a Travel Trailer?
The best leveling app is one that reads your phone’s tilt sensor and shows clear side-to-side and front-to-back angles. Many free and paid RV leveling apps exist in app stores. Still, a phone is only a helper. Confirm the result with a real bubble level.
Phone sensors can drift, and cases can tilt readings. When choosing an app, look for these features:
- A simple, large display
- Calibration for your phone
- Clear side-to-side and front-to-back readings
- Easy-to-read colors for outdoor light
Read recent reviews in the app store before you download. Features and ratings change often. For the safest results, use the app as a quick check and rely on a physical level for the final call.
How to Level a Trailer Home
Leveling a trailer home, meaning a manufactured or mobile home, is very different from leveling a camper. It involves piers, shims, and a solid foundation, and it should be done by a licensed professional. Local codes and installer rules apply, so verify them before any work begins.
Travel trailer methods do not work here. A manufactured home sits on support piers, not wheels and blocks. If floors feel sloped or doors stick, the home may have settled. Common signs include:
- Cracks in walls or ceilings
- Doors that will not close
- Gaps near windows
- Sagging floors
Contact a licensed manufactured home installer or contractor. Your state housing office or local building department can explain the rules. Federal housing standards also apply to many manufactured homes. Never lift a home yourself.
Common Leveling Mistakes and Easy Fixes
The most common mistakes are leveling front to back first, skipping chocks, and using stabilizers as lifts. Each one can cause damage or an unsafe setup. Luckily, all three are easy to fix with a simple routine and a little patience.
Mistake 1: Leveling the wrong direction first.
Fix: Always do side to side first, then front to back.
Mistake 2: Forgetting wheel chocks.
Fix: Chock the tires before you unhitch every single time.
Mistake 3: Using stabilizers to lift.
Fix: Use blocks, ramps, or a proper jack for lifting only.
Two bonus errors are worth noting. Some campers trust a phone app alone. Others skip a base board on soft ground. Both lead to a trailer that shifts overnight.
Time-Saving and Money-Saving Leveling Tips
Keep your leveling gear in one bin, label it, and store it near the door. Buy a few quality blocks instead of many cheap ones. A small routine saves time at every stop and helps your gear last for years.
Try these easy ideas:
- Pick your site wisely. A flat pad saves effort.
- Mark your block stacks. Use tape to remember the count that works for your trailer.
- Carry a spare board. It helps on sand, mud, and gravel.
- Use a helper. Two people finish in half the time.
- Level before you unpack. You avoid moving heavy items later.
Also, use a small pocket level for a quick final check. It weighs almost nothing and costs little.
Is Leveling Really Worth It?
Yes, leveling is worth the effort. A level trailer sleeps better, drains better, and protects key appliances. Many RV refrigerators, especially absorption models, need a fairly level position to work well. Your manual lists the exact limits for your fridge.
Leveling also helps in smaller ways. Doors open and shut properly. Slide-outs move more smoothly. Water drains where it should. And you will not feel like you are sleeping on a hill.
It also builds good habits. A calm, steady setup makes the rest of camp easier. For a quick overnight stop, you may skip perfect leveling. But for a multi-night stay, always take the time.
FAQs
How level does a travel trailer need to be?
A travel trailer should sit as close to level as you can get it. Small tilts are usually fine for sleeping. But your refrigerator may need tighter limits. Check your owner’s manual and appliance guides for exact tolerances. When in doubt, aim for the bubble in the center.
Should I unhitch before leveling?
Yes, in most cases you should chock the wheels, then unhitch. Level side to side while still hitched, since you need to drive onto blocks. After unhitching, use the tongue jack to level front to back. Always follow your manual for safe steps.
Can I level a travel trailer by myself?
Yes, but it is slower and riskier. Use a phone app, a mirror, or a camera to see your tires. Move in very small steps and check often. A helper is better, because they can watch the blocks and guide you.
What do I do if I’m out of blocks?
Look for safe, sturdy options like thick lumber or flat boards. Avoid rocks, bricks, or cinder blocks, since they can crack. A better choice is to pick a different campsite or buy proper leveling blocks at an RV store.
Does leveling affect the fridge?
Yes, it can. Many RV fridges use an absorption system that needs a level position to work well. If the trailer tilts too far, cooling can drop and parts can wear faster. Check your fridge manual for the exact limit.
Conclusion
Leveling a travel trailer does not need to be hard. Follow the same steps each time and your setup will feel easy.
Three takeaways:
- Level side to side first, then front to back.
- Chock the wheels, and use stabilizers only to steady, never to lift.
- Match your method to your site, trailer, and tools.
A level camper means better sleep, a happier fridge, and a calmer start to every trip. If you plan to camp often, consider travel insurance and roadside coverage for peace of mind, and always book campsites with the details you need. Now go find a flat spot, set your bubble level, and enjoy the view.

Ben Fogle believes that true adventure begins where the pavement ends. After spending years documenting extreme environments, rowing across oceans, and trekking through frozen landscapes, he mastered the art of wilderness travel. For Travelmarse, Ben constructs highly detailed guides on deep-nature packing lists, wildlife safety, and sustainable eco-tourism. He breaks down intimidating, rugged expeditions into clear, step-by-step roadmaps so everyday travelers can safely connect with the natural world.